TABLE OF CONTENTS
Create New Personnel File
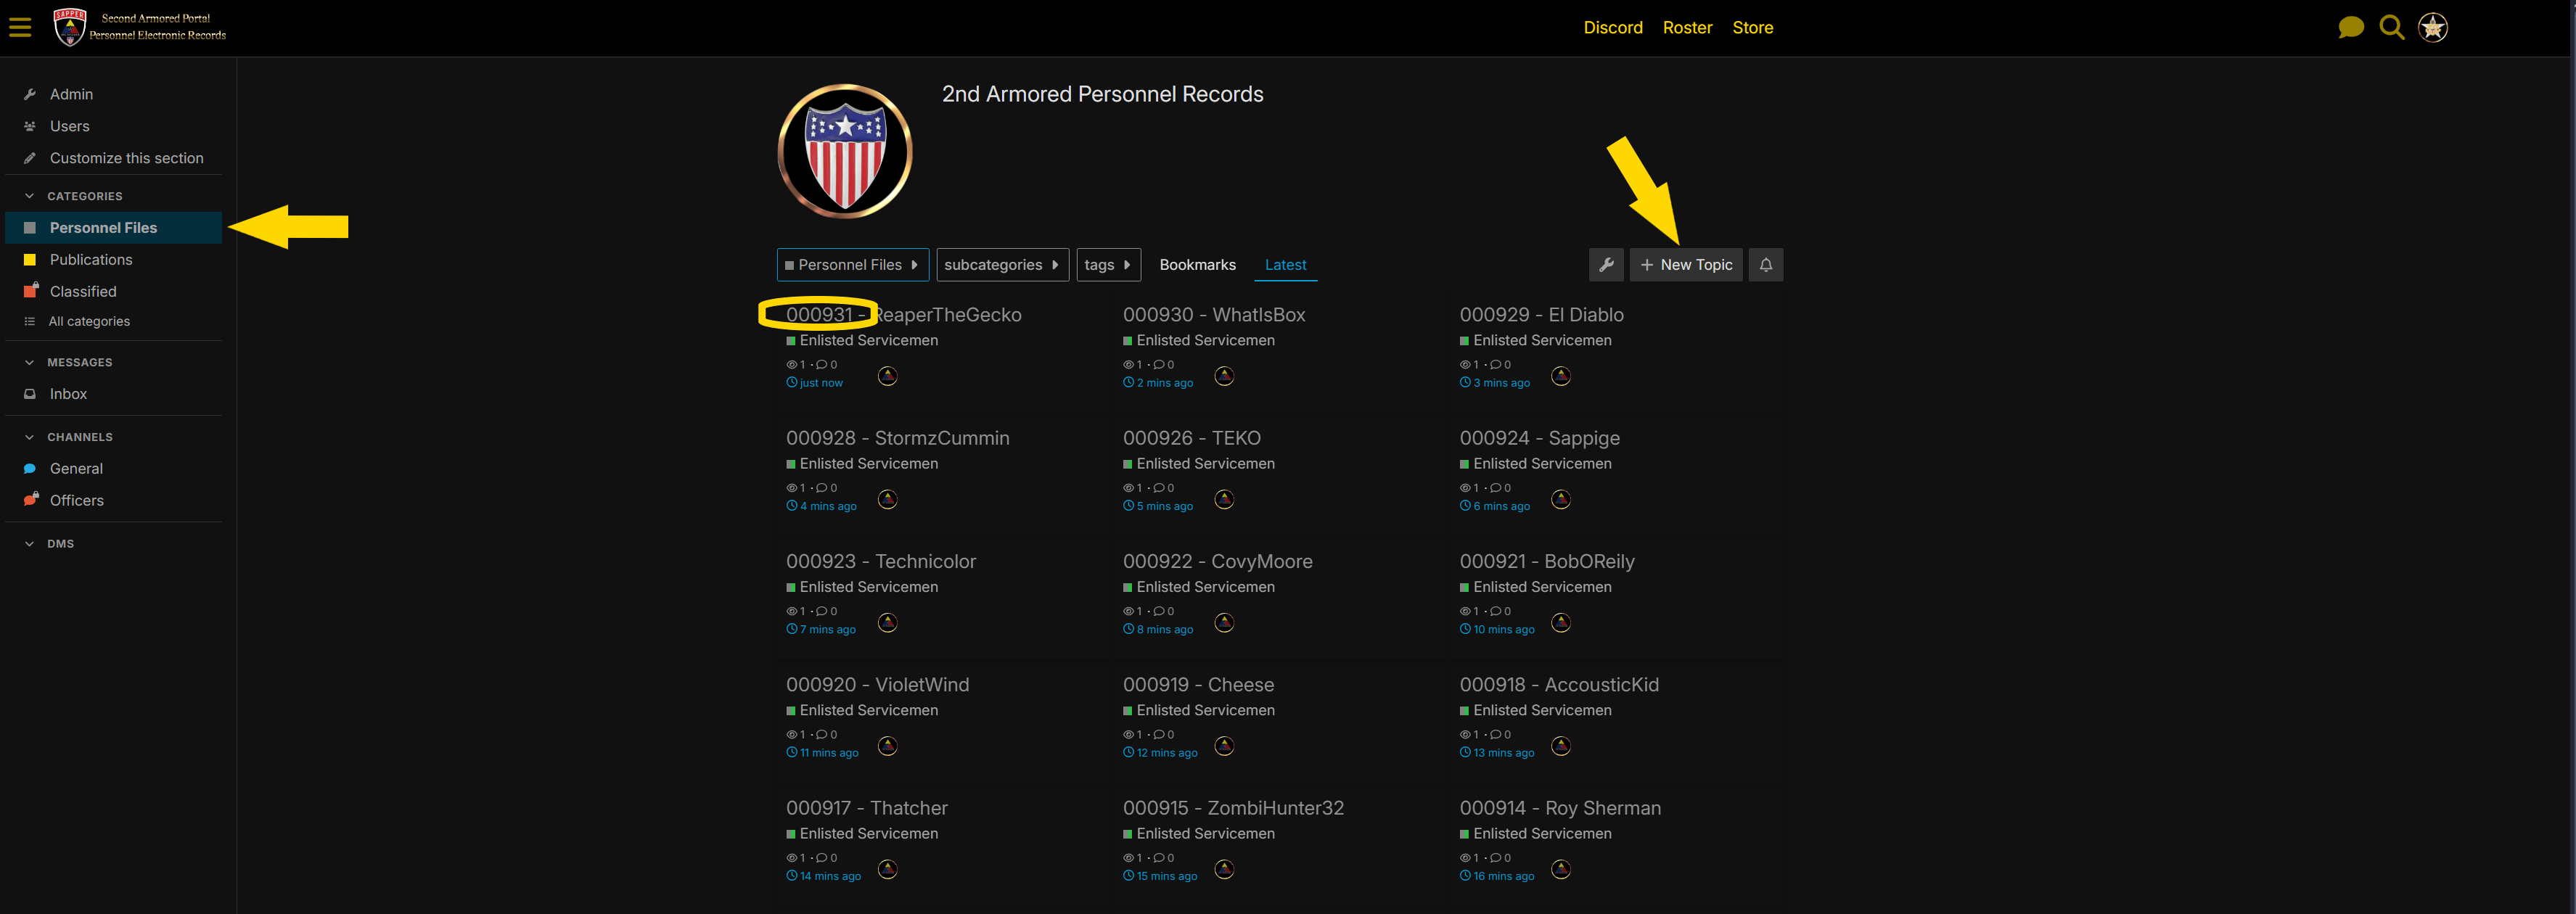
- Navigate to the link titled “Personnel File Search” and note the serial number of the newest recruit. You will be using the next serial number in sequence for this new file.
- Navigate to the Personnel Files section of the website using the side menu.
- Click on “New Topic” To begin the creation of a new personnel file.
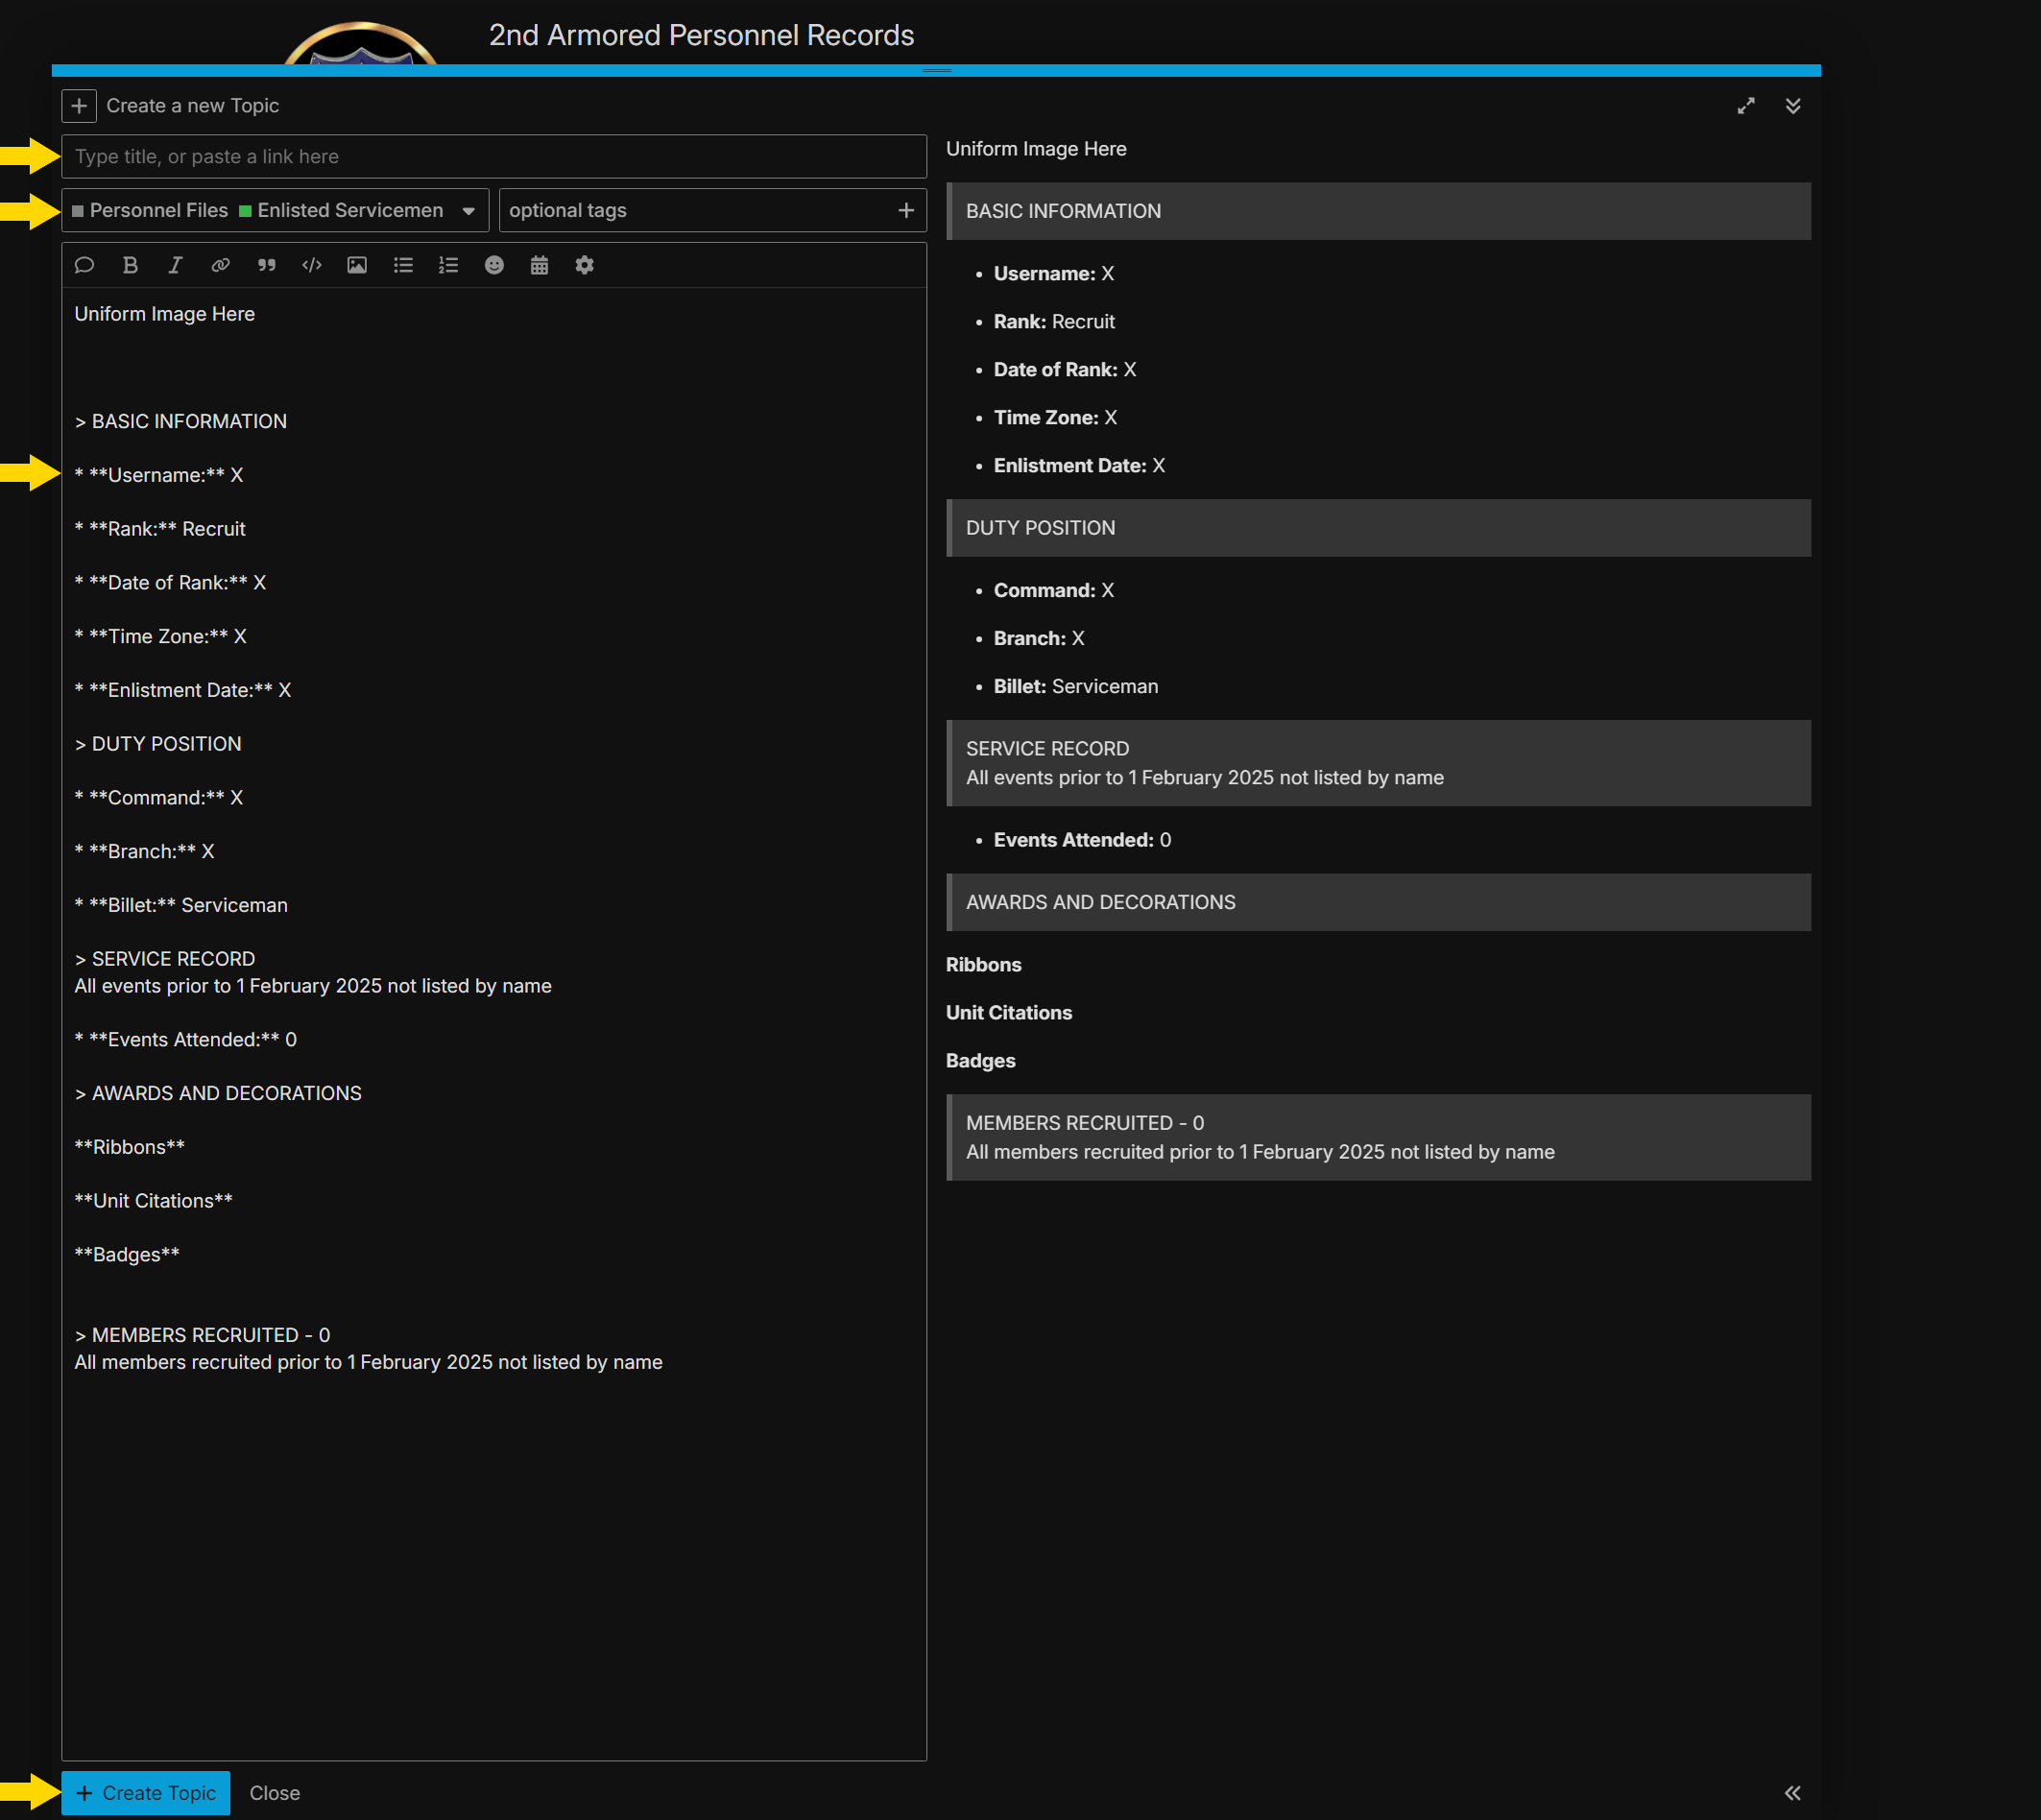
- Enter the serial number and username of the new member, using one number higher than the newest member
- Directly below the name, use the dropdown menu to select Personnel Files - Enlisted Servicemen as shown above. The template for creating an enlisted personnel file will auto-populate below.
- Begin entering the initial relevant information marked with an X in the template using the information provided from the enlistment application.
- Username - Copy from above
- Date of Rank and Date of Enlistment will be the date the application was submitted.
- Time Zone - AUTZ / US West / US Central / US East / EUTZ
- Command - Division Command / Hell Let Loose / Squad
- Branch - List the battalion the recruit requested to join.
- Click “Create Topic” at the bottom of the form.
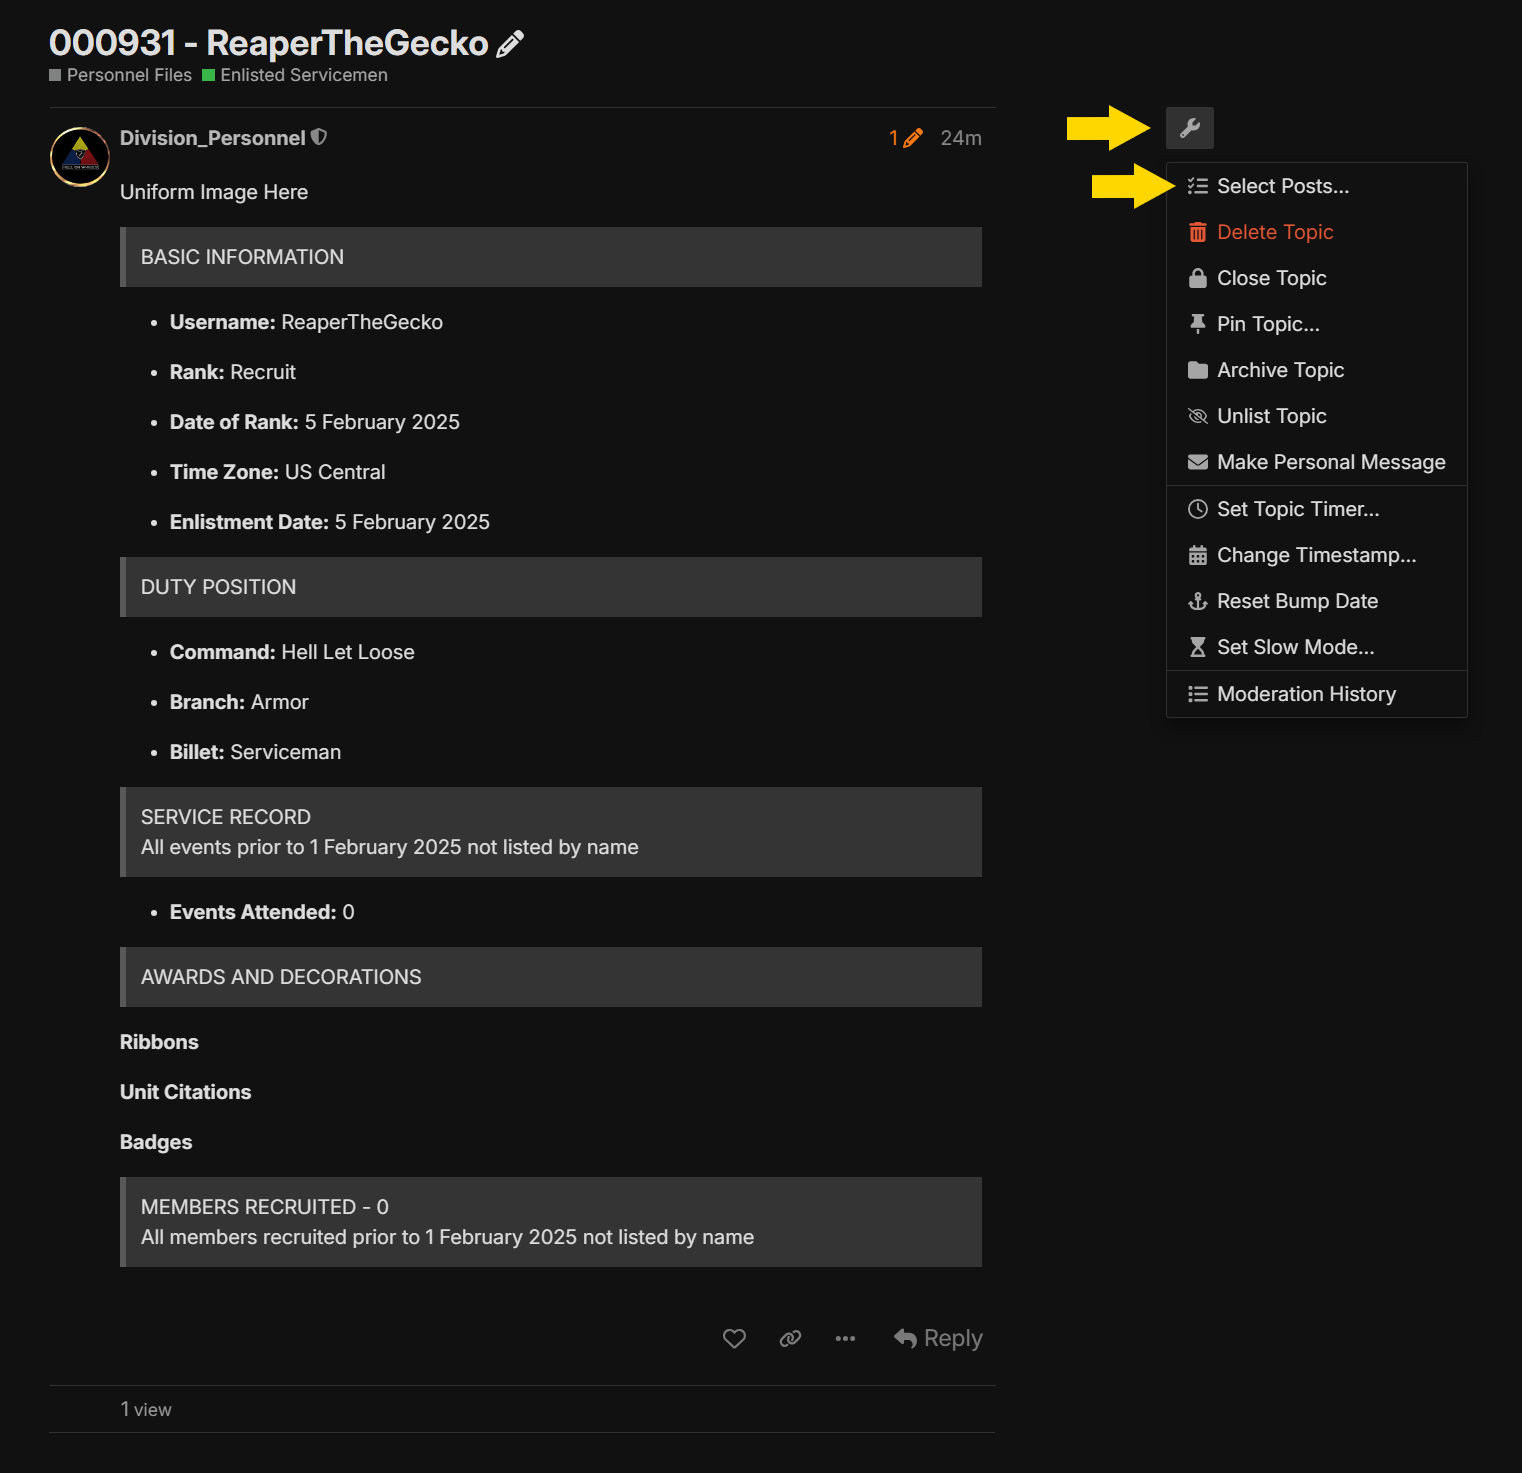
- The personnel file will be shown in the next window. Click the wrench and “Select Posts”
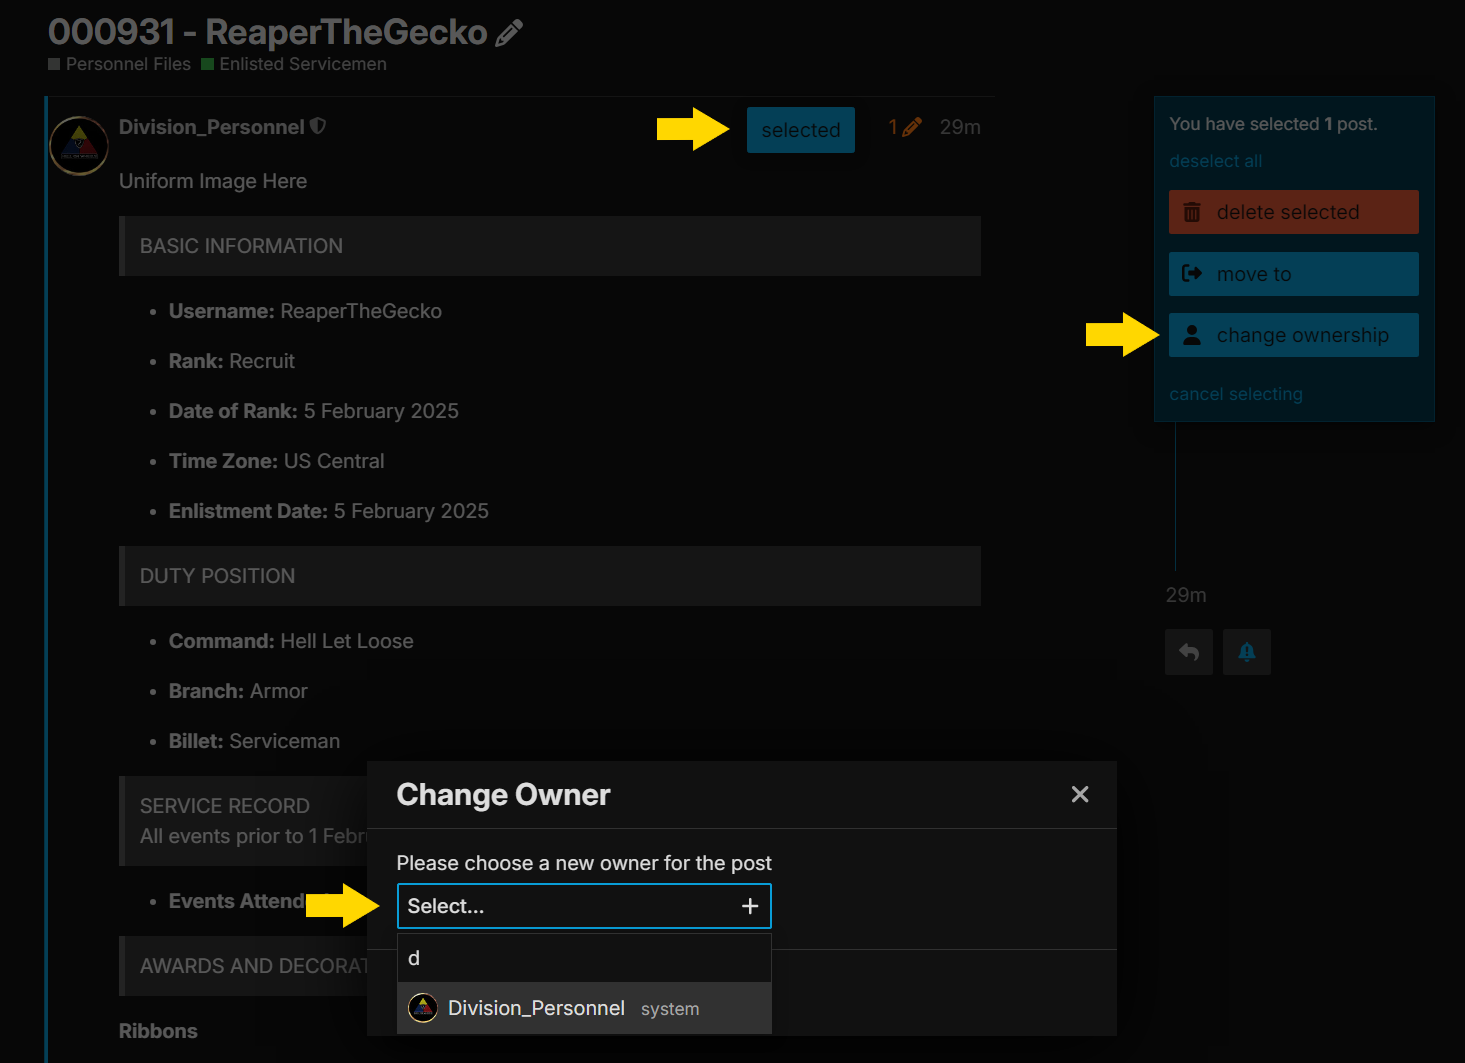
- Select the file you just created
- Click the box “change ownership”
- Select Division_Personnel (Typically if you type in “d” it will show up on the list)
- Click the box “change ownership”
- The file should now show as being created by Division_Personnel
The personnel file has now been created and will show up in the personnel files.
Your last step is to do back into Discord under the Applications section and react with a 2nd Armored logo to signify that the personnel file has been created.
Edit Existing Personnel Files
-
Access the personnel file you wish to edit.
-
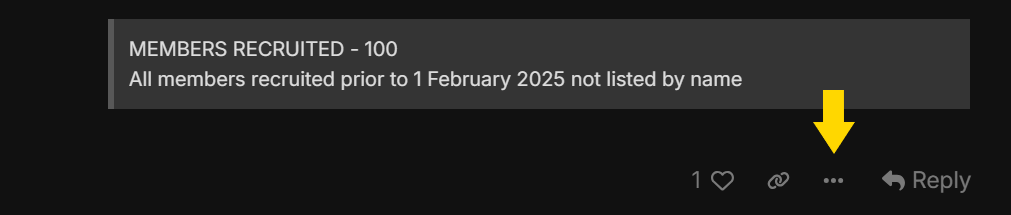
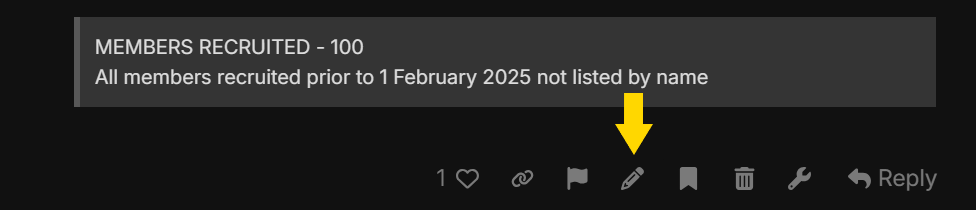
Click the 3 dots at the bottom of the record shown below, then click the pencil to edit.
-
Add or remove the information as needed, then click “Save edit” at the bottom.